10 Tools For YouTubers to Grow Their Brand
Use technology to make better videos, reach more subscribers, and monetize your channel sooner!

Use technology to make better videos, reach more subscribers, and monetize your channel sooner!
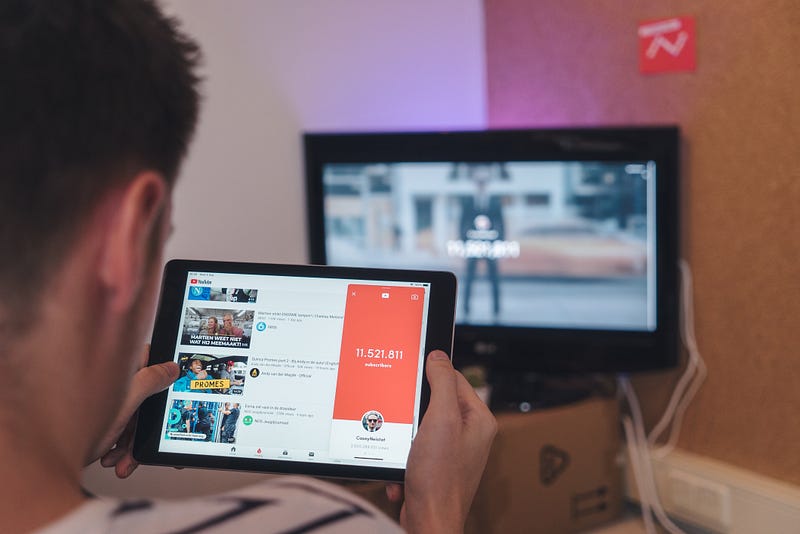
YouTube is the world’s second-largest search engine and is growing at an enormous rate. As people are shifting more and more online since the onset of the pandemic, many netizens find themselves on YouTube to learn, earn, and get entertained.
According to TechCrunch, around 1 billion hours of video are watched on YouTube every single day. Imagine how huge this opportunity is!
Visual content always has a better engagement rate because it directly talks to the viewers. And if you’re a content creator who’s looking to grow their brand, then there’s no better place for you than YouTube.
To help you grow your brand on YouTube and to monetize it along the way, I’ve compiled a list of ten tools for you. I’ve used these tools extensively to grow my YouTube channel, and some of them are so underrated, I feel more people should know about them. So read on, and watch out for a special bonus for Vloggers and passionate YouTubers at the end.
1. TubeRanker
The most important element of growing on YouTube is the keyword and title research. Because they tell YouTube who your target audience is and help to rank your videos on search results.
But still, most of us get lazy here and try to avoid the research by assuming what people might be searching for. And then we complain why YouTube is not giving us any traffic.
I don’t want this for you, that’s why here’s a tool that can help: TubeRanker.
Here’s what it does
It does keyword and title research for you, plus a ton of things that help you rank and get traffic.
TubeRanker has a very simple and self-explanatory interface. It takes away the boring work off your to-do list so you can focus on the things that matter to you the most, i.e. content creation.
Just visit the website and choose what you want, enter a few keywords related to your content, and Voila! You get everything you need that you can simply copy-paste and use it inside your YouTube Studio.
Cost
You can try it for Free with limited credits. If you wish to use more, the upgrade starts with $19/month. Check out the full pricing here.
2. Noise Blocker
If you’re recording voice inside your video, you need to make sure the audio quality is top-notch. If the sound is a turn-off, then people will leave as there’s no shortage of options available to them. This will hurt your watch time metrics.
That’s why you need to take special care about the audio quality and the background noise. If you live in a place where you can’t avoid noises, then Noise Blocker is your tool.
Here’s what it does
It’s an easy-to-customize noise blocker that helps you mute any unwanted microphone noise while recording or streaming.
The best thing about this tool is that you can train it for which noises to block and which to let go. Just record some samples of any noise you want to block out. Noise Blocker will analyze the incoming audio against your noise list and mute accordingly, letting only desirable sounds through. There’s a demo available on their homepage showing you how exactly it blocks the noise, check it out here.
It’s compatible to set up with any app for audio or video recording.
Cost
You can use it for free for only one hour each day. But I’d recommend you to buy its premium, which comes for $19.99 at just a one-time fee. Check the pricing structure here to get more details.
3. Pixlr
Thumbnails are similar to the headings of the article. Just like no one will click on the article if the headlines suck, similarly, no one will click on your video if your thumbnails suck. That’s why it’s one of the most crucial elements to win on YouTube.
You might be using Canva or other tools for thumbnails, but I’m going to introduce you to my favorite tool here: Pixlr.
Here’s what it does
Earlier, I used to create my thumbnails on Canva and then give them a final touch on Photoshop as Canva provides limited control. But since the day I found Pixlr, I didn’t need the switching any longer.
It’s a very powerful, yet intuitive online photo editor to help you edit photos and create great designs and thumbnails using AI. The editor lets you open almost any image format, such as SVG, WebP, PSD, PXD, JPEG, PNG, and more, which is why I like it more than Canva.
You can start with either empty canvas or select one of the pre-made templates. Just download any stock footage, open Pixlr’s editor, use AI to do Professional-level editing in minutes, and you’re done for the day!
Cost
The free plan lets you do limited editing and you’ve to deal with ads. The upgrade starts with as low as $4.90/month billed annually, and it’s totally worth it. Check out the whole pricing structure here.
4. Storyblocks
While creating videos, you might need some stock footage in between to elaborate on few points. Or royalty-free music to elevate the rhythm of your video. But if you go and purchase them individually, the cost of each YouTube video will shoot up. That’s where you should use Storyblocks, to create amazing videos without breaking the bank.
Here’s what it does
It provides thousands of royalty-free footage, music, photos, and everything you’ll need to create a story in your videos, without facing any copyright infringements. You can also edit your videos within its editor.
With the unlimited subscription, you can download as many stock video clips as you need. Its library contains millions of HD and 4K videos, all hand-selected from industry-leading videographers to help make your work shine.
Cost
There is no free plan, and the upgrade starts at as low as $10/month. You can also purchase the Unlimited Video or All Access plans. Check out the pricing here.
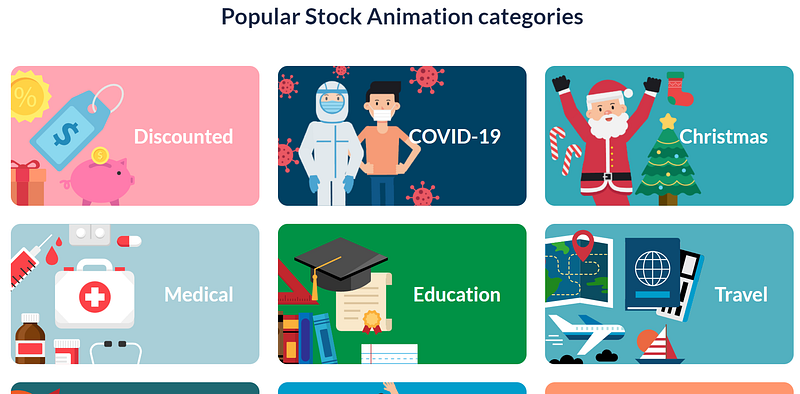
5. VideoPlasty
If you’re making cartoon explainer videos or animated videos to tell a story, then Storyblocks might not be the best place for you. It does have a collection of animated footage but you won’t find the whole suite of similar characters and continued scenes for storytelling. That’s where I’d recommend using VideoPlasty.
Here’s what it does
It’s a library of royalty-free animated video assets, motion graphics, and more.
You can do advanced searching to find the exact character, icon, or background scene, or whatever you’re looking for and download it. It also provides a pack of similar scenes bundled together to help you create a story while keeping the aura of the video similar all the time.
The footage is Full HD and gives an alpha channel to provide transparency if needed. And downloadable files are compatible with nearly all video editors, so you can open your favorite editor and use these files to do amazing storytelling.
Cost
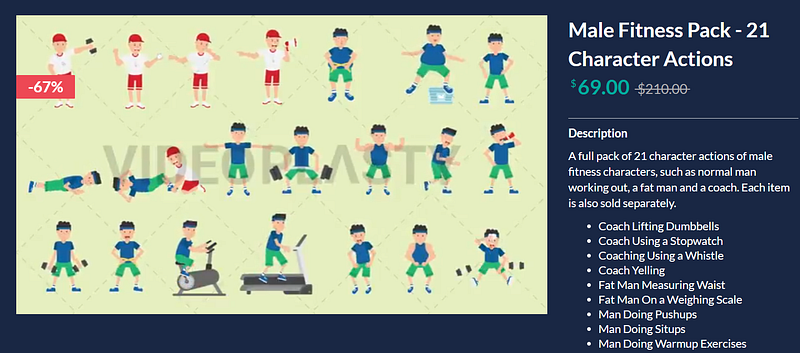
It has some free assets if you’re looking for experiments, which you can check here. The rest of the assets are paid, and pricing is done individually per asset. You can download packs of multiple assets as well to save some money, like the screenshot below.
6. Biteable
Once you’ve recorded the video and all your assets are ready, now is the time to edit it. Most YouTubers get stuck here. They think editing is the most crucial step and they definitely need to ace it, else their video won’t perform. This is actually a big myth!
Content is the king, and will always be. Editing just needs to complement it. There are many videos on YouTube which are unedited or have very basic editing, but attracted millions of views because the content was awesome.
So don’t let this myth be a hurdle towards your YouTubing dream. That said, the editing tool I’ll recommend here is Biteable.
Here’s what it does
The industry editing standard is to use Adobe products, and definitely they give the best editing experience. But they’re more for the professional-level editors or advanced YouTubers. You don’t need it to start out, and if you’re not into entertainment content creation, then basic level editing is enough for you.
Biteable is the easiest online tool I came across, which helps you edit videos professionally, even if you don’t have any pro-level “technical or editing skills”. It also has a huge library of pre-made templates and stock footage which you can directly import inside your editor.
Watch this video to get familiar with the interface and the procedure to edit inside this tool.
Cost
You can use it for free, forever. There’s no limit to how many videos you can create inside it, and you get the library of 4 million clips and animations to use. But it’ll contain the biteable watermark in the free plan. The upgrade starts at $19/month, check it out here.
7. Rev
After you’ve created the video, you might want to include subtitles in it to make it easier for your audience to follow. It also lets you reach people who don’t speak your language. The fastest and the cost-effective way to get it done is by outsourcing it to Rev.
Here’s what it does
Just go to their website and upload your video, and they’ll provide the subtitles within few hours.
They’re mostly known for their 99% accuracy and ultra-high-speed to get work done at a very reasonable cost, which is why they’re my favorite.
They really save you all the time and hassle of hiring a freelancer on your own who might do the work slowly and inaccurately. While Rev already has a network of 30,000+ transcriptionists and translators — primarily based in the U.S who do it for you at an incredible pace.
Their turnaround time is within 24 hours in case you need any revision, which you won’t in most cases.
Cost
Rev charges $1.25 per video minute caption. If you wish to use other services of Rev, you can check out the pricing here.
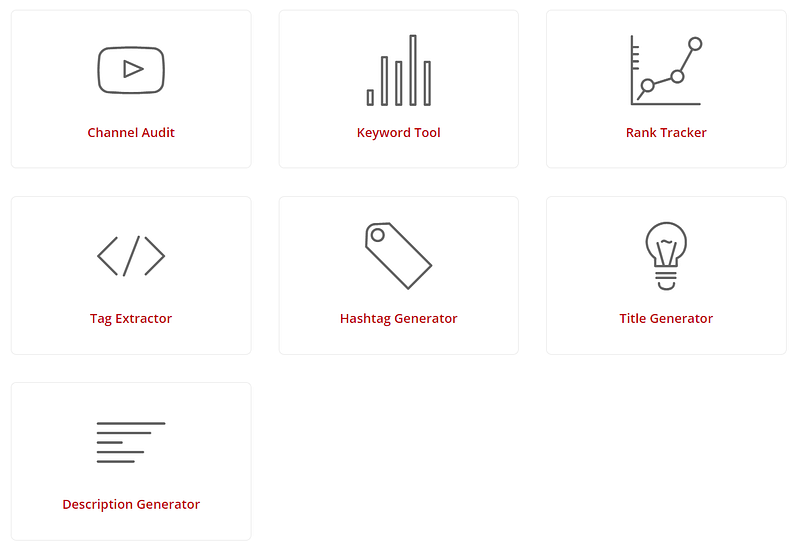
8. Vid IQ
To grow on YouTube, you need to have a huge grip over the analytics to know which video is performing and which is not. You also need to understand the competitor strategy to shorten down your experimental curve. My go-to tool for this purpose is Vid IQ.
Here’s what it does
It is designed specifically to grow on YouTube. It utilizes the power of AI to provide powerful tracking and analytics with competitive insights to help you create a full-proof Youtube plan to get results.
Download its Chrome Extension and it’ll redirect you to watch a video to set it up on your YouTube.
You get access to all YouTube insights like engagement rates, tags used, rankings, suggested frequency of competitors, and views. All of this is powered by data visualizations and reporting, and are available all in one place. This makes it really easy to take a data-backed decision without getting lost in numbers.
It also provides you daily ideas based on what’s trending and how competitors are performing, along with channel optimization suggestions.
Cost
The free plan is more than enough to start out. If you need more freedom around the tool, then you can buy the Pro plan starting with $7.50/month. Check all the upgrades here.
9. Woobox
As true with all forms of content, creation is not enough. You need to promote your content actively on every platform in the initial stage, to give it maximum exposure. Woobox can help you here with exposure on Facebook.
Here’s what it does
This tool lets you showcase your videos from your YouTube channel on Facebook, which lets you get tremendous exposure among your FB audience.
You can select a video you’d like to be featured, and it’ll play automatically when someone visits the page tab. Visitors can click through and view other videos in the gallery too, without ever leaving the tab.
There’s a lot more this tool can do, but getting your videos to play on FB is enough for you to start out.
Cost
It has a free plan which gives you everything I mentioned above. If you want to use it more, then check the upgrades here.
10. RedditBests
As promised before, here’s the special bonus recommendation for vloggers and passionate YouTubers who want to take their videos to the next level.
You can start your channel with zero investment, and once your content is monetized, reinvest the money into buying technical equipment like cameras, mic, lights, etc. They’ll enhance the production quality of your videos and gain you an even more loyal subscriber base.
But as creators, it’s hard to know which equipment to buy, especially since you’re spending so much money and you want the best value. That’s where RedditBests comes in. It’s a super cool website I found while randomly browsing the internet, and have sworn by ever since. It curates the most popular technical products in the world right now recommended by Redditors.
The best part is that there are no ads or sponsored content. The rankings of the products are organic, based on what Redditors recommend. You can check the reviews, choose the product that suits your requirement, and the website will take you to Amazon where you can purchase it. It’s hassle-free and reliable, and my go-to place for buying whatever equipment I choose to invest in.
Final Words
YouTube is growing at an enormous rate as people are spending more and more time online. If you start today, within few years you’ll have a huge audience and multiple active and passive income streams set up.
In this article, I’ve curated ten software tools that can help you kickstart your YouTubing journey. Here they are:
- TubeRanker: Does the keyword and title research for you, plus a ton of metrics that help you rank your videos higher and get more traffic.
- Noise Blocker: Mutes all the unwanted noise and lets the desired ones through.
- Pixlr: Helps you create professional-level thumbnail designs that get you more clicks.
- Storyblocks: Provides an unlimited library of stock footage and royalty-free music.
- VideoPlasty: Provides a huge library of animated and motion graphic stock assets.
- Biteable: Makes editing smooth and easy for you, no pro-level editing skills required.
- Rev: Provides subtitles to your videos at a very low cost and high speed.
- Vid IQ: Shows easy-to-digest numbers to plan your YouTube strategy which gets results.
- Woobox: Lets you host your YouTube videos on the Facebook tab, to get more exposure.
- RedditBests: Find the highest-rated equipment chosen by Redditors from all over the world.
I hope this article has inspired you and armed you with all the tools to get started on your YouTubing Journey. I’m planning to write more like these, so if you want me to write a compilation of the best tools in a particular field, do let me know in the comments below.
Author’s note: Some of the links mentioned in this article are sponsored. But I’ve used these tools personally to grow my YouTube and love them so much, I would never have shared them with you if I didn’t think they can add amazing value to your life and journey as a YouTuber.