AI Model Photography: How to Create Product Photos with AI Models (2026 Guide)
Learn how to create product photos with AI models. Step-by-step guide to AI model photography tools for ecommerce, fashion, and product marketing in 2026.


A few years ago, if you wanted a model in your product photos, you needed:
- A photoshoot
- A location
- A photographer
- And a budget that kept increasing with every variation
Now you can generate product photos with models in under a minute without a studio, scheduling, or reshoots.
AI model photography works incredibly well, if you use it the right way.
It can look obviously fake if you don’t.
In this guide, I’ll show you exactly how to create product photos with AI models, what tools to use, and how to get results that actually look usable for ecommerce.
What Is AI Model Photography?
AI model photography is the process of placing your product on a digitally generated human model using AI tools.
Instead of hiring models, you can:
- Upload your product image
- Select or generate a model
- Choose a background or setting
- Generate realistic lifestyle photos
This is especially useful for:
- Clothing brands
- Accessories
- Beauty products
- Lifestyle ecommerce stores
Why Ecommerce Brands Are Switching to AI Models
The biggest advantages are cost, control, and speed.
With AI, you can:
- Test multiple models (different looks, styles, body types)
- Create unlimited variations
- Generate new campaigns instantly
- Avoid reshoots
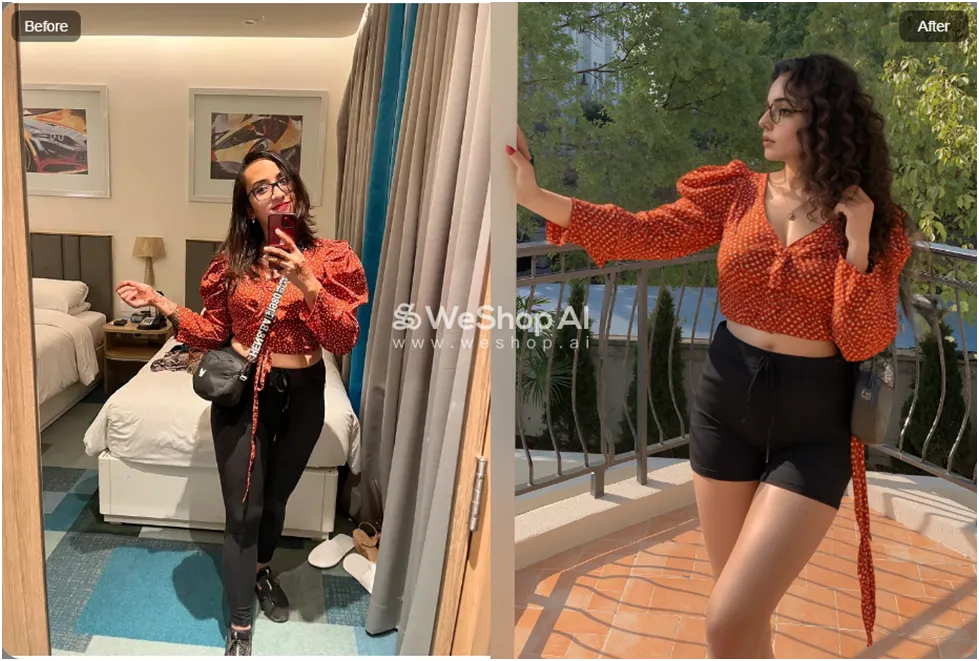
👉 Tools like WeShop AI are built specifically for this, allowing you to generate product photos with AI models in different settings.
Step-by-Step: How to Create Product Photos with AI Models
Step 1: Start with a Clear Product Image
Your base image matters more than anything.
Use:
- Good lighting
- Minimal background
- High resolution
If your input image is unclear, the final result will look off.
Step 2: Choose the Right AI Tool
Not all AI tools handle models well.
For example:
- WeShop AI → best for AI model product photography
- Freepik AI → useful for generating styled scenes and variations
- Phot.AI → helpful for cleanup and editing after generation
Pick your tool based on your goal:
- realism
- variety
- editing flexibility
Step 3: Select or Generate an AI Model
Most tools let you:
- Choose from pre-generated models
- Or upload a face to create a custom model
Start with pre-built models as they tend to look more realistic.
You can experiment with:
- Different poses
- Body types
- Facial features
- Expressions
Step 4: Add Your Product to the Model
Now comes the core step.
Upload your product (for example: clothing, glasses, accessories), and let the AI place it on the model.
This works best when:
- The product image is clean
- The angle matches the model pose
- The product is clearly visible
👉 With tools like WeShop AI, this process can generate multiple variations in seconds.
Step 5: Choose a Background or Scene
Instead of shooting on location, you can generate environments like:
- Café settings
- Minimal studio backgrounds
- Outdoor scenes
- Lifestyle environments
👉 Tools like Freepik AI help create more stylized and campaign-ready visuals.
Step 6: Generate Multiple Variations
Don’t rely on one image.
Generate multiple versions and select the best:
- Different poses
- Different lighting
- Slight variations in styling
AI works best when you treat it like iteration, not a one-shot tool.
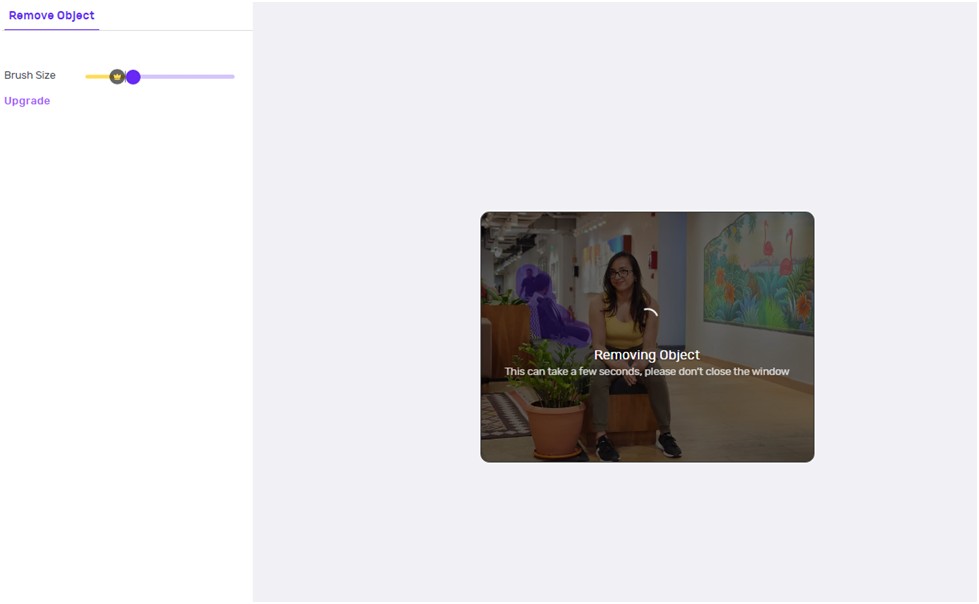
Step 7: Fix Imperfections
AI models can still produce issues like:
- Distorted hands or proportions
- Slight mismatches in clothing
- Unrealistic textures
Use editing tools to clean things up.
👉 Phot.AI is useful for removing objects, fixing edges, and improving final outputs.
Common Mistakes to Avoid
- Uploading poor-quality product images
- Using mismatched angles between product and model
- Over-editing the output
- Expecting perfect results in one try
- Not checking small details (hands, fabric, edges)
When AI Model Photography Works Best
AI model photography is ideal for:
- Clothing brands
- Dropshipping stores
- Fast product launches
- Social media and ads
- Testing different creative directions
When It Falls Short
AI still struggles with:
- High-end fashion campaigns
- Complex poses
- Ultra-realistic textures
- Close-up detail shots
For premium branding, real photoshoots still have an edge.
Final Thoughts
AI model photography is one of the biggest shifts in ecommerce visuals.
It doesn’t just reduce cost, it changes how fast you can create, test, and scale product images.
Tools like WeShop AI, Freepik AI, and Phot.AI make it possible to go from a basic product image to a full lifestyle shoot in minutes.
But the real advantage isn’t the technology, rather It’s how you use it.
Affiliate Disclosure: This article contains affiliate links. If you purchase through them, I may earn a small commission at no extra cost to you.